IoT Gateway: 96Boards HiKey
This page describes how install a customized Debian distribution onto the 96Boards HiKey reference platform for using the HiKey as an IoT Gateway device.
Note
Before following these instructions, make sure to set up your IoT Device first.
Note
If you’re not familiar with 96Boards or the HiKey, detailed documentation is available from 96boards.org as well as LeMaker.
A 96Boards UART daughter board is useful for accessing the HiKey’s UART.
Download Software
Download the following reference platform components.
Note
This requires a working install of fastboot and Python on your host PC.
UEFI release for HiKey (build 150):
wget https://builds.linarotechnologies.org/End-to-end_IoT_system/17.02-preview/Hikey-Gateway/l-loader.bin
wget https://builds.linarotechnologies.org/End-to-end_IoT_system/17.02-preview/Hikey-Gateway/fip.bin
wget https://builds.linarotechnologies.org/End-to-end_IoT_system/17.02-preview/Hikey-Gateway/ptable-linux-8g.img
wget https://builds.linarotechnologies.org/End-to-end_IoT_system/17.02-preview/Hikey-Gateway/hisi-idt.py
Debian Stretch IoT Reference Platform Build for HiKey (build 45):
wget https://builds.linarotechnologies.org/End-to-end_IoT_system/17.02-preview/Hikey-Gateway/hikey-boot-linux-20170215-45.uefi.img.gz
wget https://builds.linarotechnologies.org/End-to-end_IoT_system/17.02-preview/Hikey-Gateway/hikey-rootfs-debian-stretch-iot-20170215-45.emmc.img.gz
Extract the .gz files:
gunzip hikey-*
Place your HiKey into Recovery Mode
Turn off the HiKey board
Make sure pin1-pin2 and pin3-pin4 on J15 are linked (J601 on LeMaker HiKeys; top left side of the board)
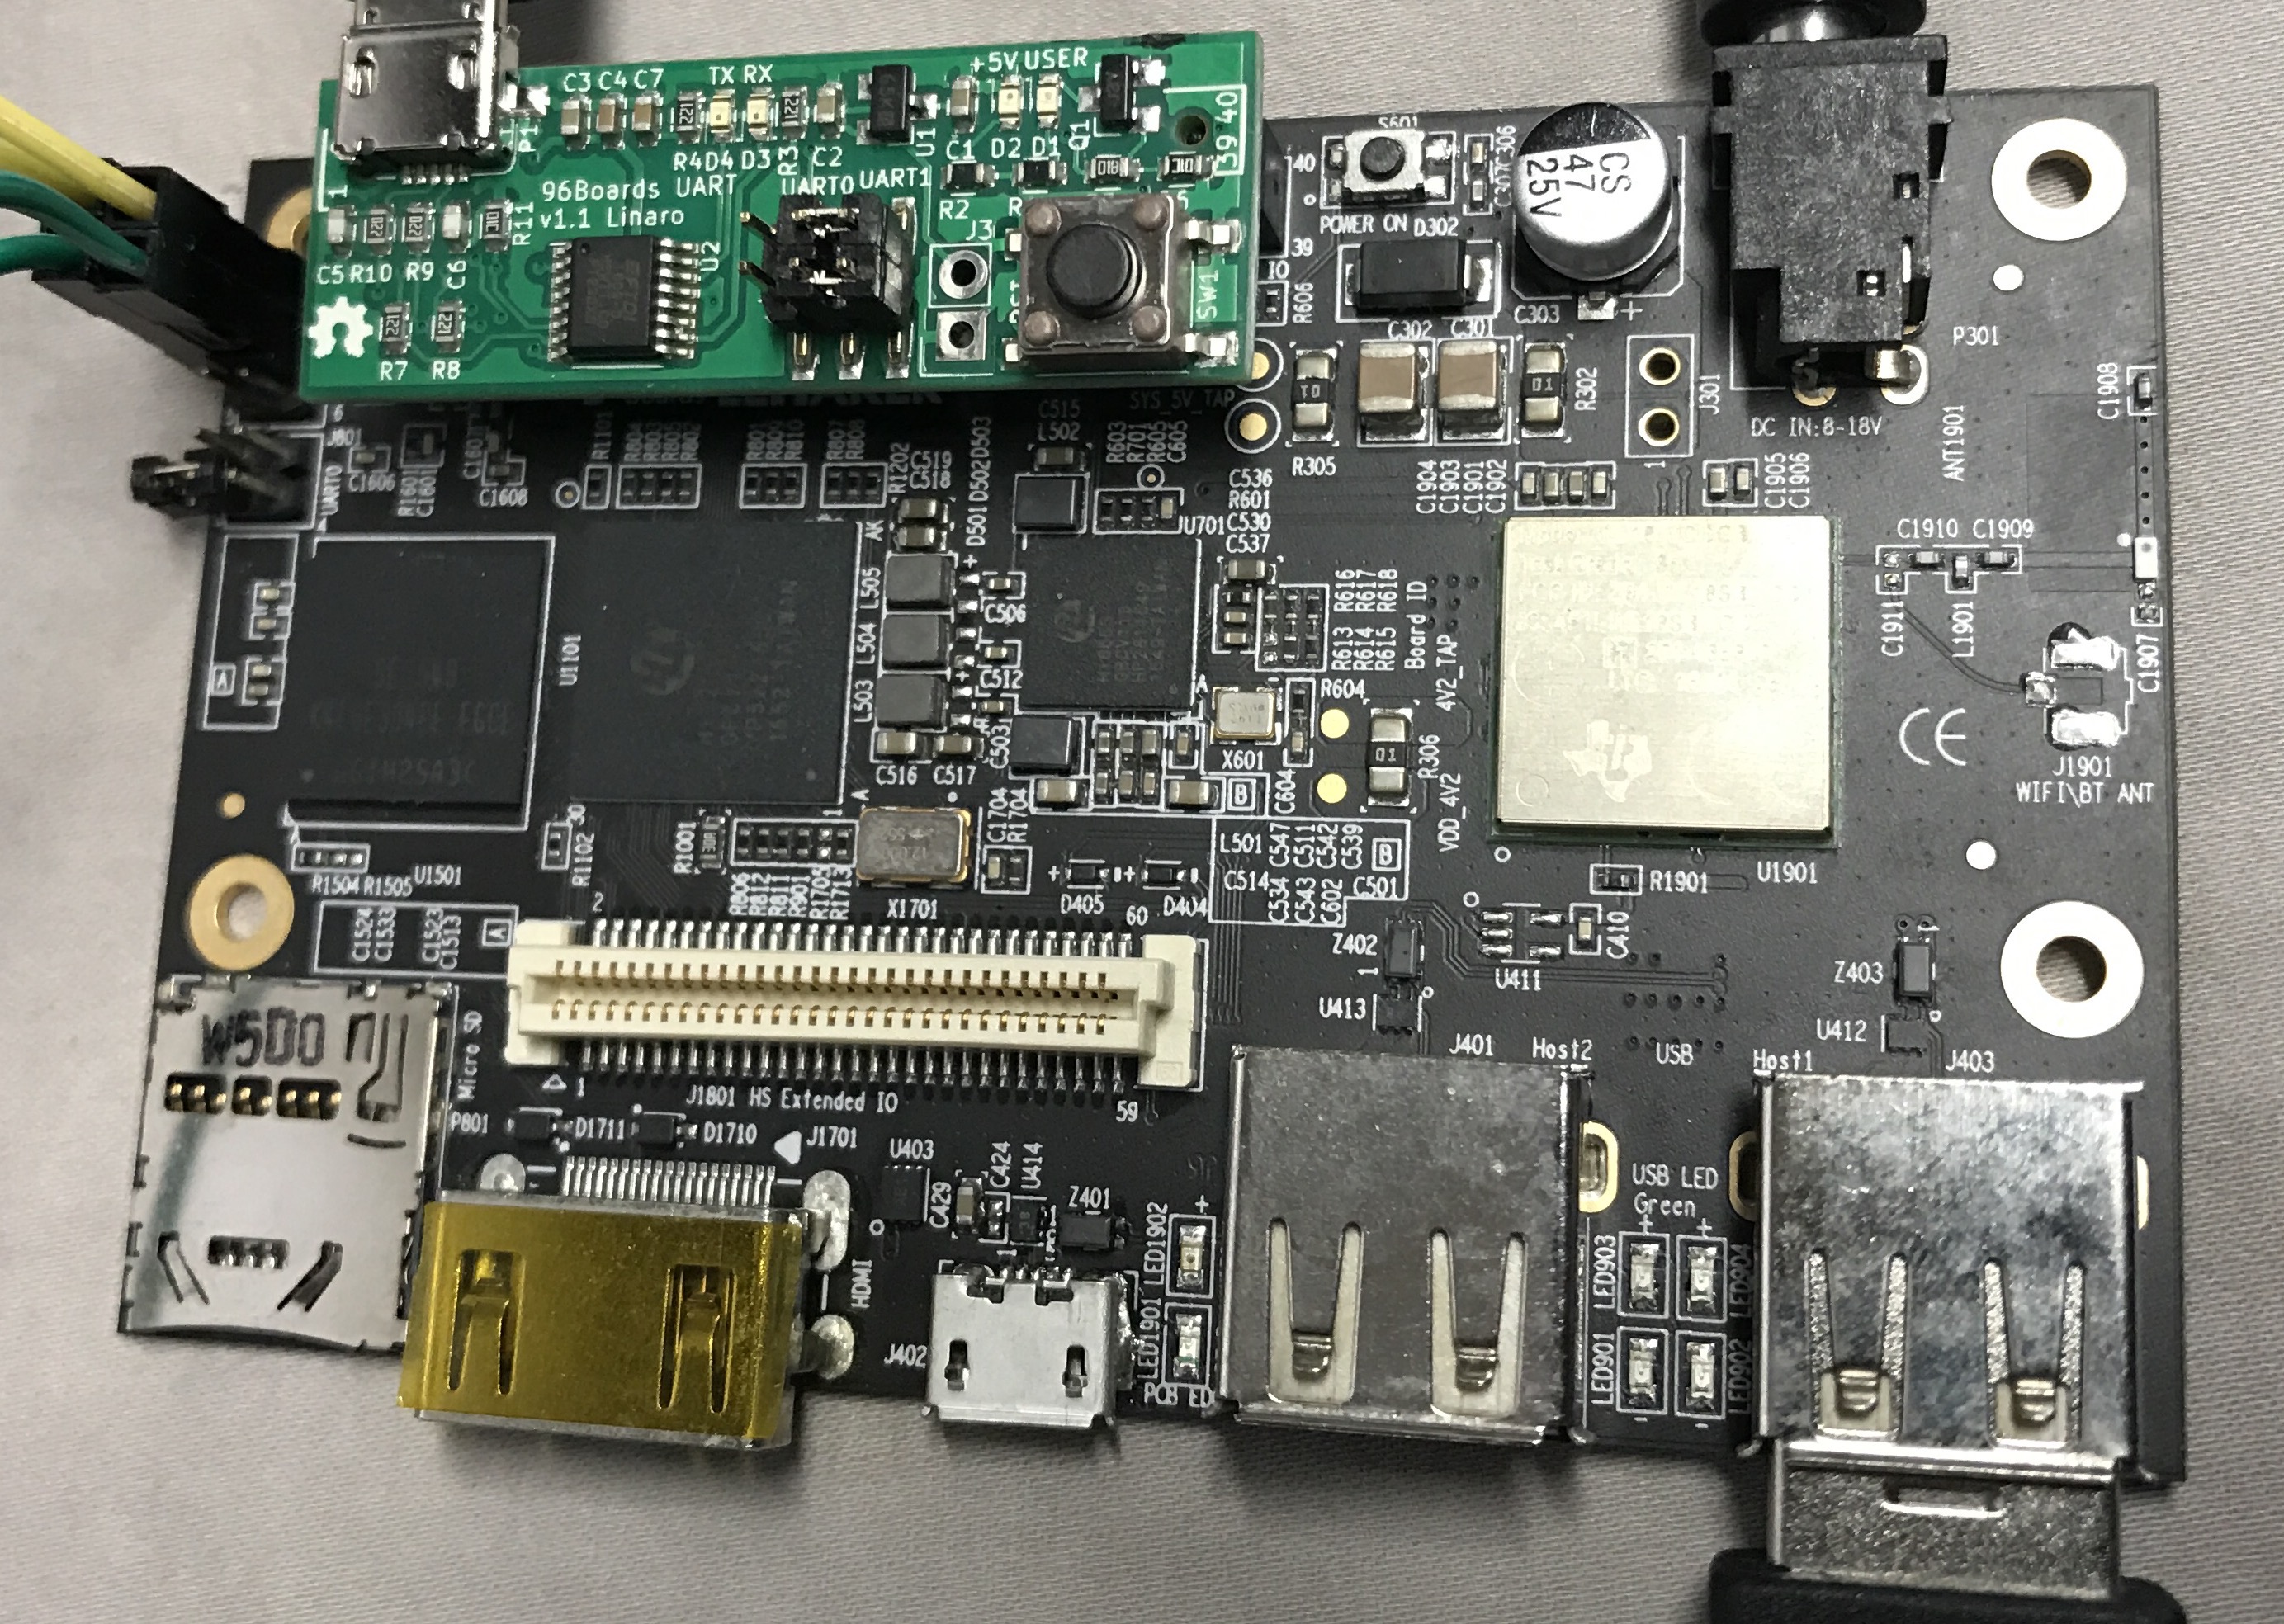
Connect HiKey micro-USB to PC with USB cable
Power the HiKey board
Flash the software
sudo python hisi-idt.py --img1=l-loader.bin
sudo fastboot flash ptable ptable-linux-8g.img
sudo fastboot flash fastboot fip.bin
sudo fastboot flash boot hikey-boot-linux-20170215-45.uefi.img
sudo fastboot flash system hikey-rootfs-debian-stretch-iot-20170215-45.emmc.img
Boot the device
Remove the jumper from J15 pins 3-4, and power cycle the board. The GRUB bootloader will boot into the software image within 5 seconds.
Some error messages are expected during the first boot:
- Failed to start Raise network interfaces.
- Failed to start Wait for Network to be Configured.
- Failed to start OpenBSD Secure Shell server.
- Failed to start /etc/rc.local Compatibility.
No error should be reported on following boots.
Warning
At time of writing (Jan 23, 2017), HDMI must be unplugged when booting. The issue is tracked in https://bugs.linaro.org/show_bug.cgi?id=2886.
You will automatically be logged in as root on the HiKey’s serial console. You can now proceed to connect to the network for the first time.
Connect the HiKey To Your Network
Use this command at the HiKey console to connect your gateway to a WiFi network (if using a USB Ethernet USB adapter, this step is not required).
nmcli device wifi connect <SSID> password <PASSWORD>

# If you are using an Ethernet USB adapter, and want to disable WiFi:
nmcli radio wifi off
Set the location of gitci.com in /etc/hosts
To allow connected IoT Devices to connect to the hawkBit server on
your workstation via the HiKey gateway, you will need to add an entry
to the /etc/hosts file for gitci.com which points at the IP address
of your workstation that is hosting your hawkBit instance,
e.g. 192.168.0.43. If you do not configure this in your
/etc/hosts file, you will not be able to connect to your hawkBit
instance. Run this command from the HiKey console.
# Example; your workstation's IP address may be different.
# Check the output from "ip addr show" to determine the IP address of your PC.
echo "192.168.0.43 gitci.com" >> /etc/hosts
Done!
Congratulations! You should have previously configured an IoT Device using the previous pages in this guide. It will automatically connect to the HiKey Gateway via 6LoWPAN, and be able to communicate with the hawkBit server. If you haven’t done so yet, the instructions are at IoT Devices.