Set Up Basic LWM2M System
Now that you have installed the Zephyr and Linux microPlatforms, it’s time to use them to set up an end-to-end IoT demonstration system using the OMA Lightweight M2M (LWM2M) protocol.
A block diagram of this system is shown here. Though it is not explicitly shown, one or more IoT devices can connect to the network through the same gateway.
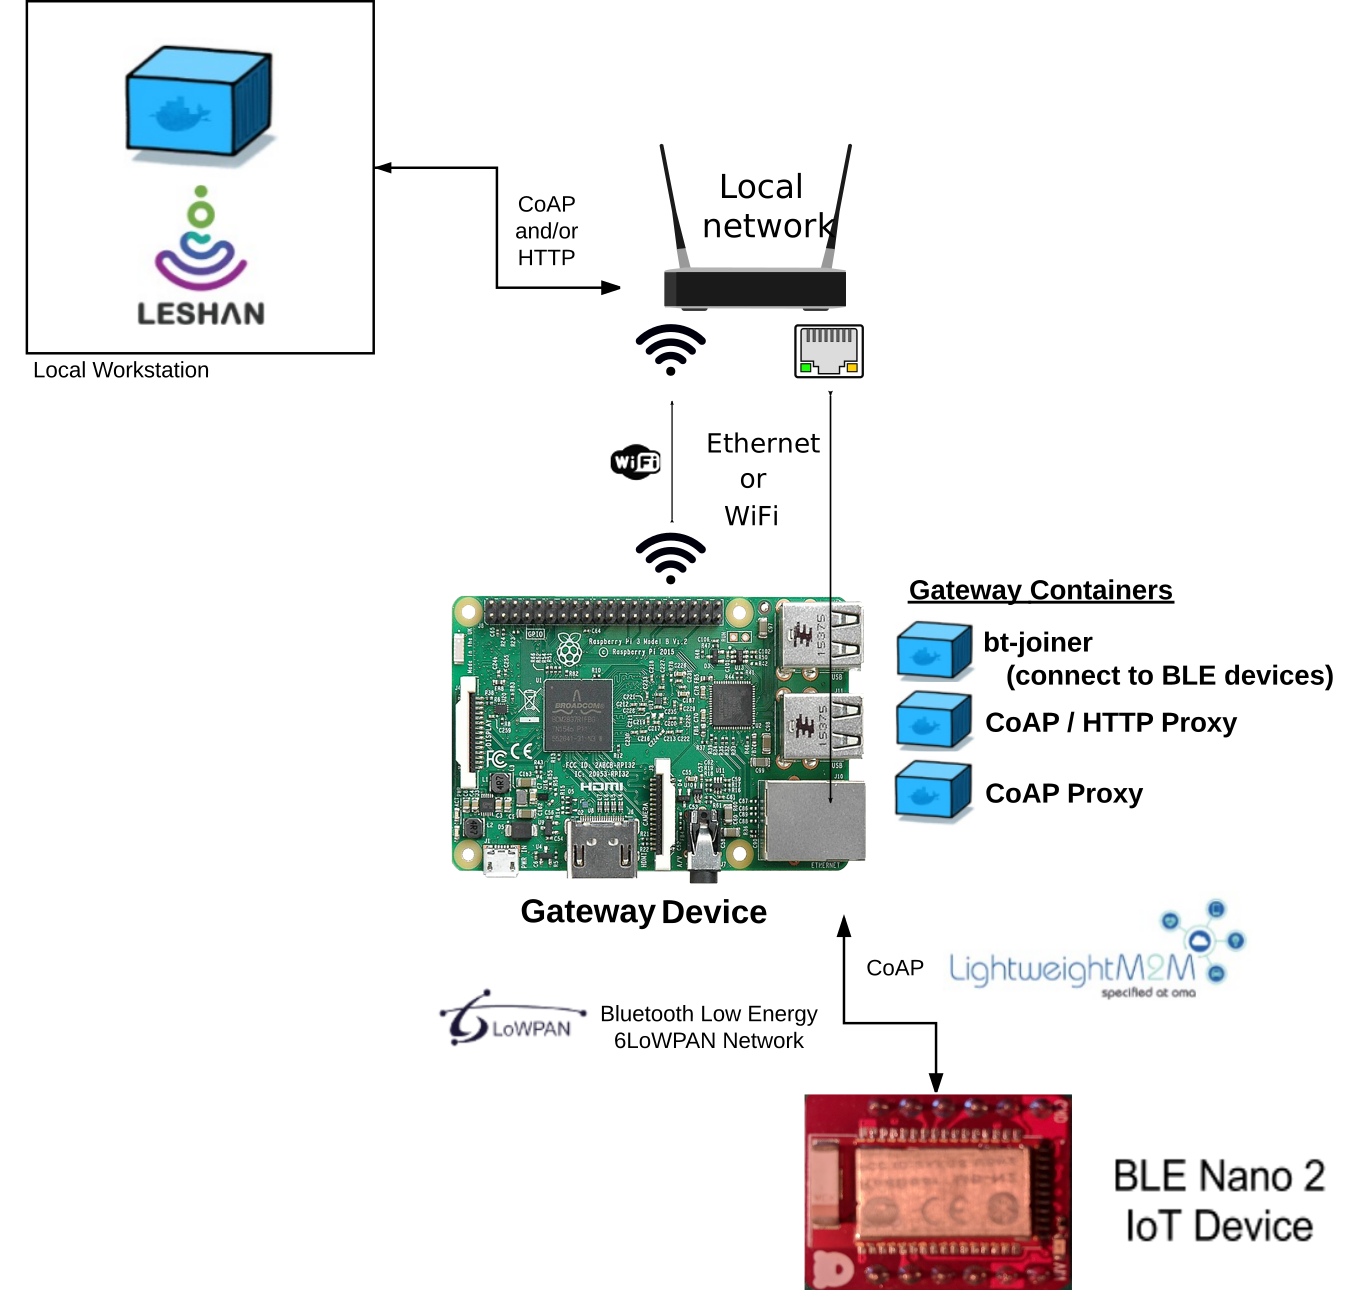
The system contains Zephyr-based IoT devices, an IoT gateway, and a web application, Leshan, that is used as the LWM2M server. With Leshan you can issue commands, query data and perform firmware over the air (FOTA) updates on the IoT device(s).
Using the demonstration system described here, you can:
- See live data readings from your devices using the Leshan web application.
- Send commands to the device, such as turning on and off an LED.
- Use Leshan to update your IoT device firmware.
For simplicity, this basic system does not secure its network communications. Instructions in the next page describe how to set up secure channels using the DTLS protocol.
Prepare the System
Begin by preparing the system for use.
Set up Workstation
Open Source Foundries provides pre-built Leshan Docker containers for use on your workstation, and Ansible playbooks and associated shell scripts you can run there which make it easier to set up your gateway.
Begin by installing Docker and Ansible on your workstation (not your gateway device).
Run Leshan on Workstation
Continue by starting a demonstration-grade Leshan server on your workstation.
Subscribers:
First, log in to the Open Source Foundries subscriber container registry on your worksation (not the gateway device):
docker login hub.foundries.io --username=unused
The username is currently ignored when logging in, but a value must be provided. When prompted for the password, enter your subscriber token.
Now run the latest subscriber container, again on your workstation:
docker run --restart=always -d -t -p 5683:5683/udp -p 5684:5684/udp \
  --read-only --tmpfs=/tmp -p 8081:8080 \
  --name leshan hub.foundries.io/leshan:latest
Public:
Containers for the latest public relase are available from Docker Hub. Run this on your workstation:
docker run --restart=always -d -t -p 5683:5683/udp -p 5684:5684/udp \
  --read-only --tmpfs=/tmp -p 8081:8080 \
  --name leshan opensourcefoundries/leshan:latest
After running the Leshan container, visit http://localhost:8081/ to load its web interface. Your Leshan container is now ready for use.
Set up IoT Gateway
You’ll now use Ansible to set up your IoT gateway to act as an LWM2M network proxy for your IoT device.
Ensure you have an SSH key on your workstation. If you’ve never done this before, the GitHub guide to SSH keys has useful instructions.
Copy your SSH key to the gateway in order to control it with Ansible:
ssh-copy-id osf@raspberrypi3-64.local
Use the password for the
osfaccount you set earlier when installing the Linux microPlatform (the default isosf, but we recommend that you change it).Clone
gateway-ansible, a repository of Ansible playbooks, helper scripts and files, and Dockerfiles, onto your workstation.Subscribers:
For passwordless authentication, create a file named
.netrc(note the leading.) in your home directory, readable only by your user, with the following contents:machine source.foundries.io login <your-subscriber-token>
If you don’t createa
.netrc, enter your subscriber token when prompted for a username, and leave the password blank.Now clone the gateway-ansible repository:
git clone https://source.foundries.io/gateway-ansible
Public:
git clone https://github.com/OpenSourceFoundries/gateway-ansible
From the
gateway-ansiblerepository cloned on your workstation, deploy the gateway containers to your gateway using Ansible.Subscribers:
GW_HOSTNAME=raspberrypi3-64.local REGISTRY_PASSWD=<your-subscriber-token> ./iot-gateway.sh
Setting REGISTRY_PASSWD to your subscriber token is necessary to ensure your gateway device can log in to the container registry. If you’re concerned about typing it directly into the terminal, you can set it in the environment via any means you find sufficiently secure.
Public:
REGISTRY=hub.docker.com REGISTRY_USER=docker REGISTRY_PASSWD=docker \
   GW_HOSTNAME=raspberrypi3-64.local ./iot-gateway.sh
These instructions assume
iot-gateway.shis run on the same machine running the hawkBit server. SetMGMT_SERVERto the IP address of the machine running the hawkBit container if your environment is different.
Your gateway device is now ready for use.
Set up IoT Device(s)
Required Equipment: IoT device and workstation to flash the device.
When using BLE Nano 2, build and flash the demonstration application for this system:
./zmp build -b nrf52_blenano2 zephyr-fota-samples/dm-lwm2m
./zmp flash -b nrf52_blenano2 zephyr-fota-samples/dm-lwm2m
Flashing this board requires pyOCD. To install this dependency, run:
pip install --user pyOCD
If you don’t have pip installed, see the pip Installation documentation. On Linux platforms, you also need to install the following udev rules as root, then unplug and plug back in any boards you may have connected:
echo 'ATTR{idProduct}=="0204", ATTR{idVendor}=="0d28", MODE="0666", GROUP="plugdev"' > /etc/udev/rules.d/50-cmsis-dap.rules
Use the System
Now that your system is fully set up, it’s time to check that sensor data are being sent to the cloud, and do a FOTA update.
Note
The Leshan user web interface is a simple web application, which does not provide a complete end-to-end device management system. The container’s simplicity makes it useful as a demonstration and prototyping system for LWM2M devices.
Read and Write Objects
When a device registers with the Leshan server, Leshan will automatically render known object types in its web interface. You can interact with these objects by clicking the Read, Write, etc. buttons which appear next to them.
Read device instance information
To read general device instance information, scroll down to “Device” > “Instance 0” and click the “Read” button as shown in the following figure.
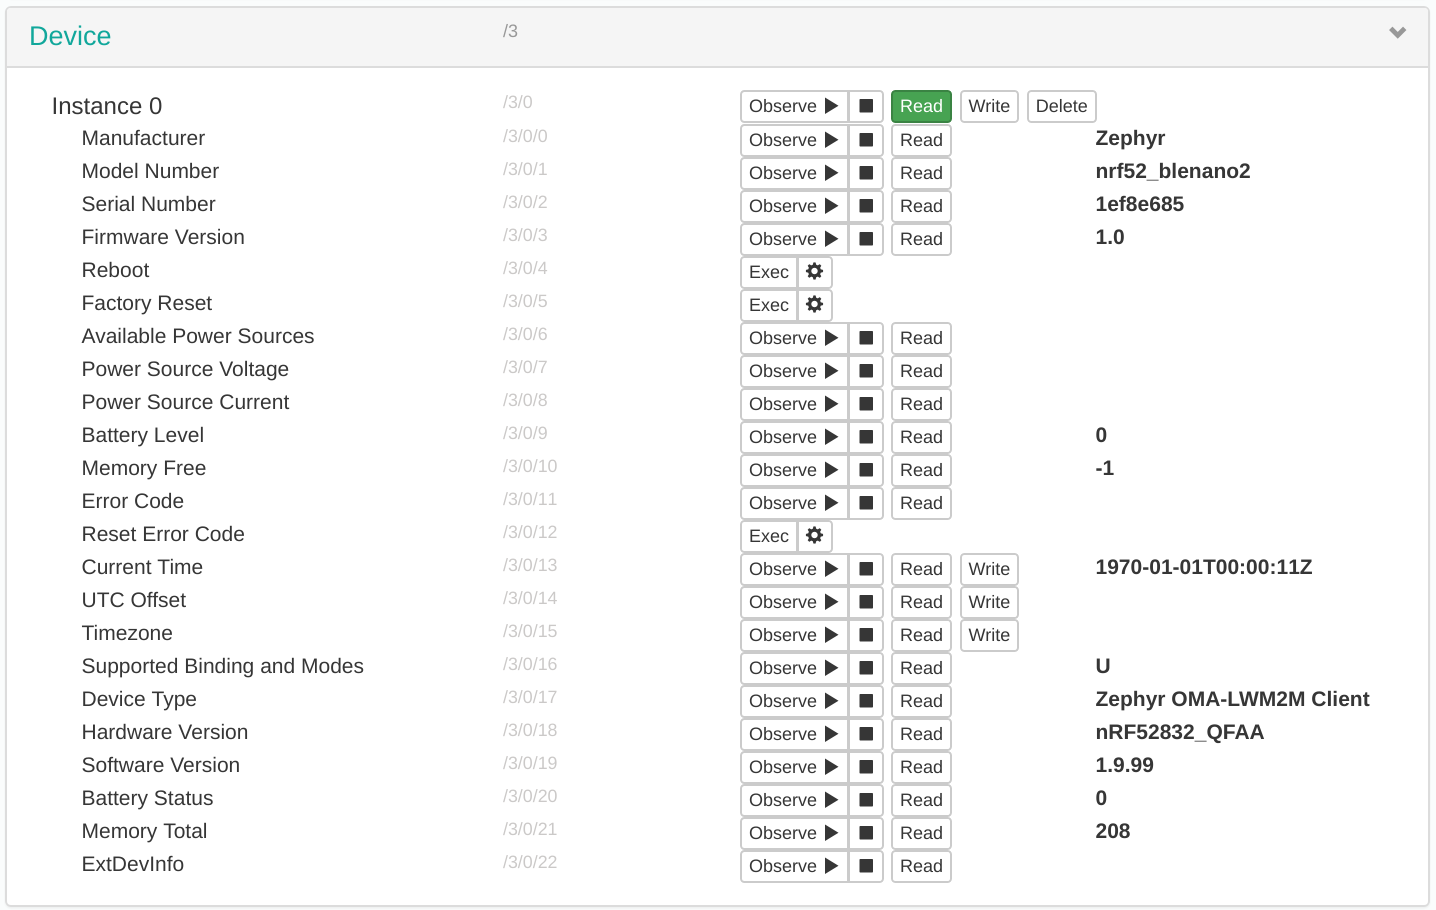
Click on the Read button following “Instance 0”.
Read current state of temperature and light objects
To read the current status of the temperature and light control objects, click the “Read” button next to each “Instance” of these objects as shown in the following figure.
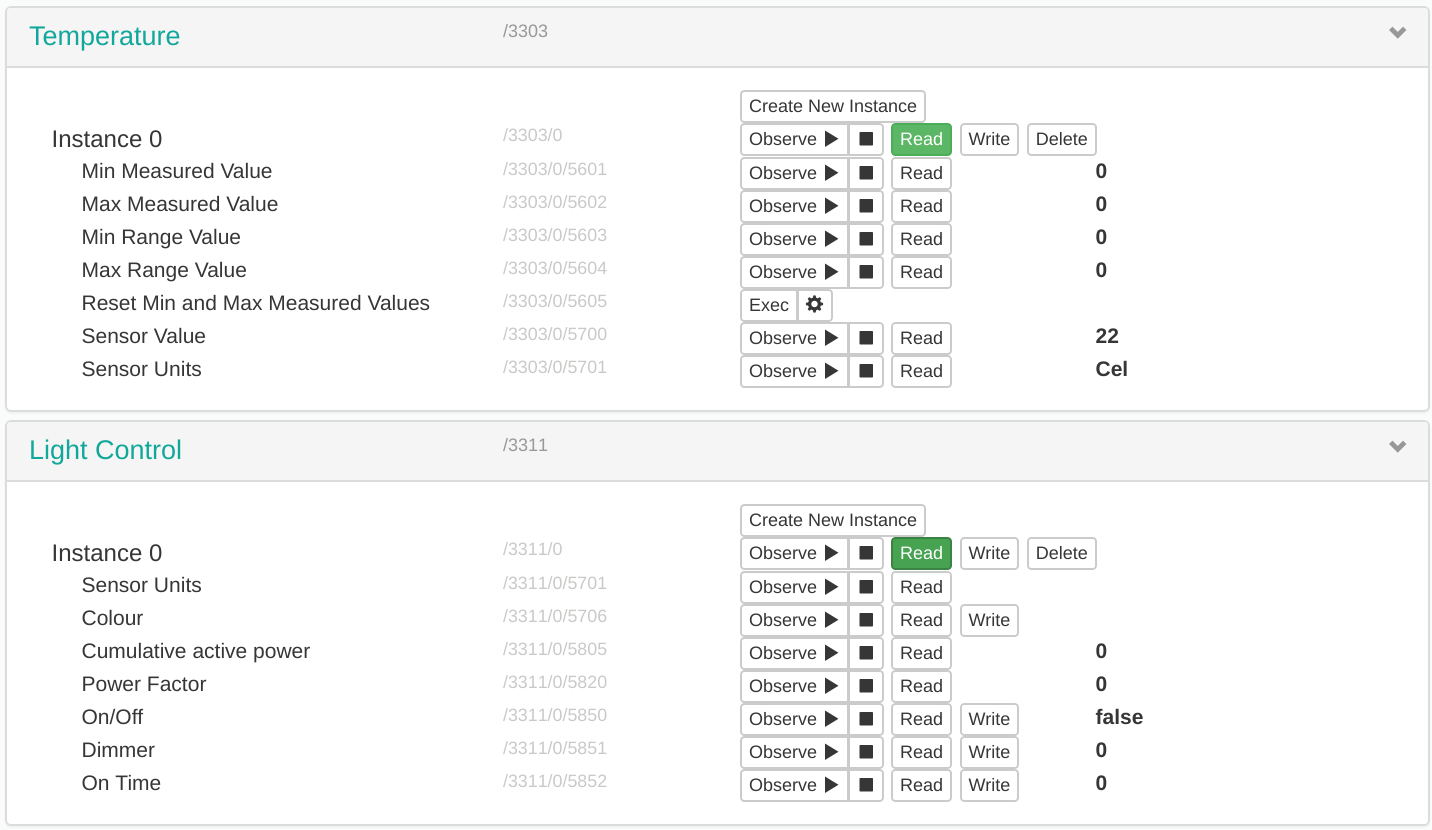
Click on the Read buttons following the instances.
Change state of the light object
Click ‘Write’ buttons to bring up interfaces for changing data. An example of this interface for the light object is shown here.
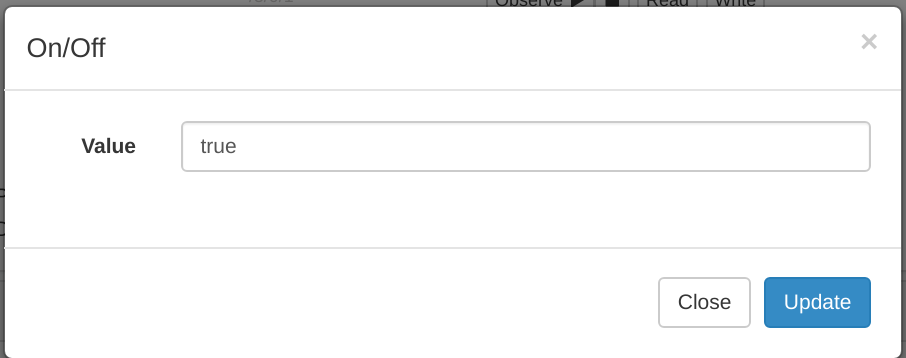
Clicking the On/Off Write button brings up this interface.
Initiate a Firmware Update
It’s now time to update the device firmware, using the Firmware Update object view in Leshan. This involves writing a URI where the firmware update is hosted to the “Package URI” field for this object. To keep things simple, you’ll “update” the firmware using the same binary you built previously, but you can also change and rebuild the program before following these steps to write new firmware.
Start a Python 3 HTTP on your workstation from the Zephyr microPlatform binary build directory for this application:
$ cd zmp/outdir/zephyr-fota-samples/dm-lwm2m/nrf52_blenano2/app/
$ python3 -m http.server
The update will then be available at:
http://YOUR_WORKSTATION_IP:8000/zephyr/dm-lwm2m-nrf52_blenano2-signed.bin
To start the firmware update, click the Write button for the “Package URI” field in the Firmware Update object, then write this value in the resulting popup, like so.
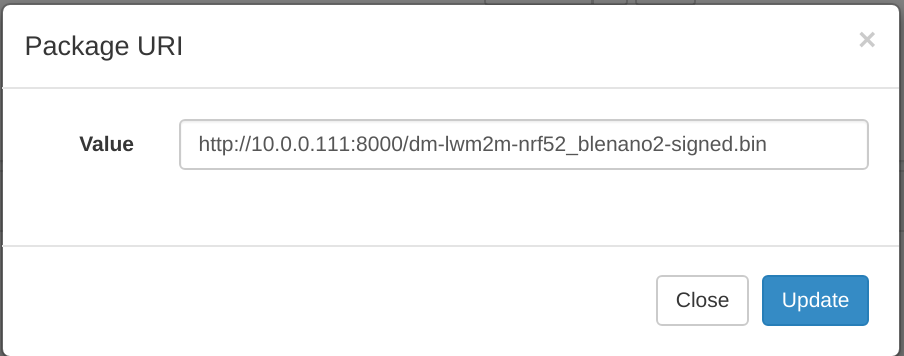
Set the Package URI field.
Once you click the Update button, the file will begin transferring to the target.
In general, the Package URI must be hosted where it is routable from
your IoT device. The URI schema can be either coap:// or
http://. The length of the Package URI must be less than 255
characters.
Monitor for a Completed Transfer
Click the “Observe” button in the State line of the Firmware Update object:
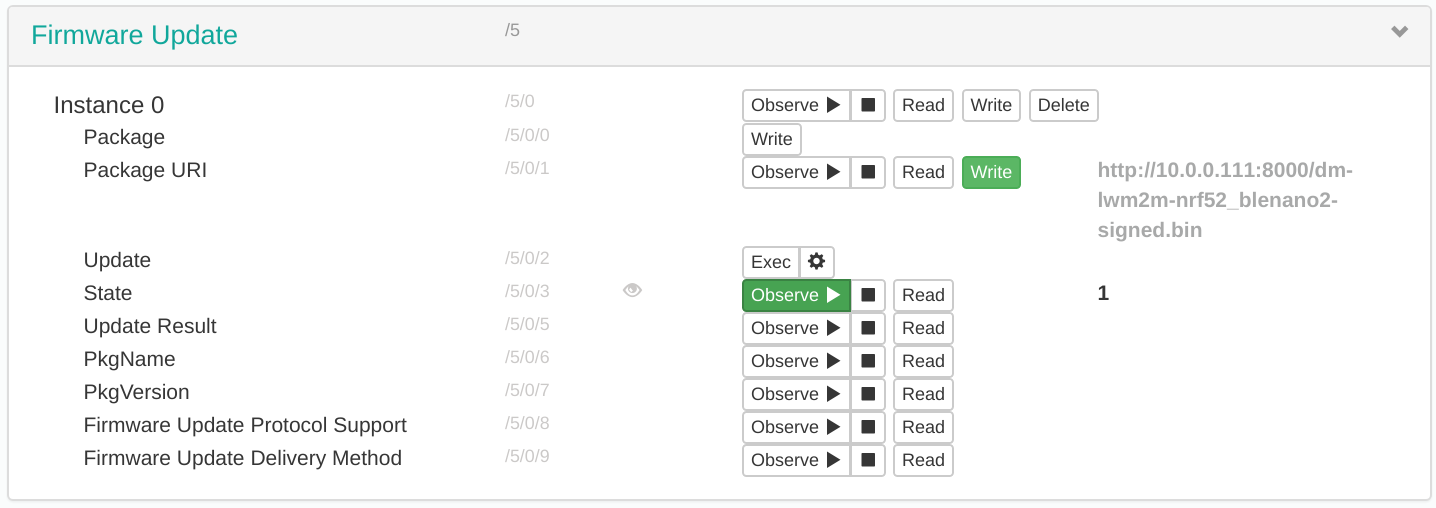
Example State observation. Value is 1 (downloading).
The state values and their meanings are:
- 0: Idle
- 1: Downloading
- 2: Downloaded
- 3: Updating
If you’re connected to the device console, progress is logged as in the following example:
[0912360] [fota/lwm2m] [INF] firmware_block_received_cb: 77%
[0920080] [fota/lwm2m] [INF] firmware_block_received_cb: 78%
[0927350] [fota/lwm2m] [INF] firmware_block_received_cb: 79%
[0931870] [lib/lwm2m_rd_client] [INF] do_update_reply_cb: Update callback (code:2.4)
[0931870] [lib/lwm2m_rd_client] [INF] do_update_reply_cb: Update Done
[0932510] [fota/lwm2m] [INF] firmware_block_received_cb: 80%
[0939070] [fota/lwm2m] [INF] firmware_block_received_cb: 81%
[0946090] [fota/lwm2m] [INF] firmware_block_received_cb: 82%
[0951050] [fota/lwm2m] [INF] firmware_block_received_cb: 83%
Monitor the transfer until the State value is 2 (Downloaded):
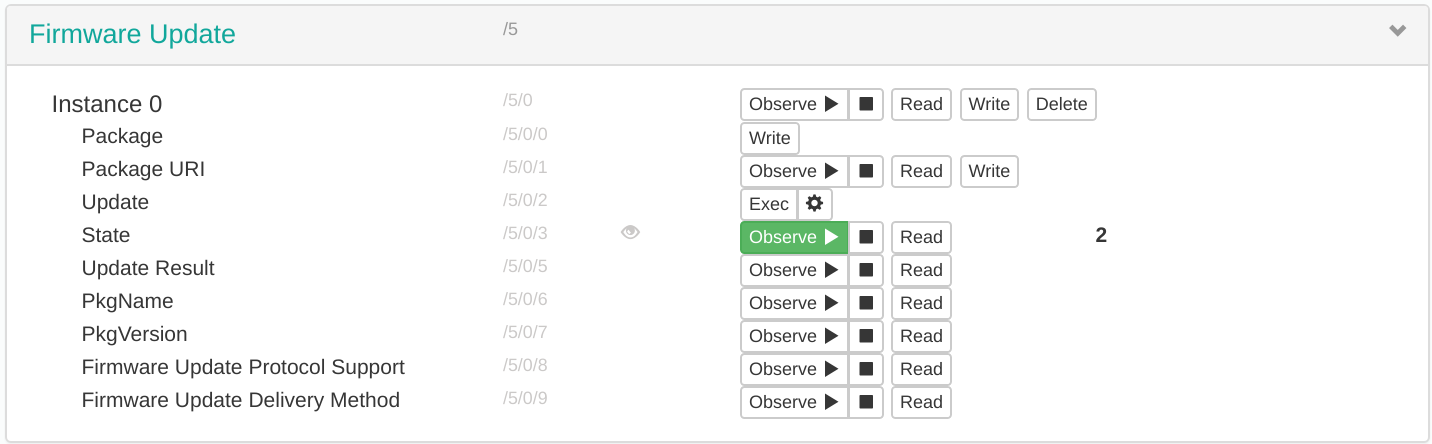
State value is now 2 (Downloaded).
Download completion is logged on the device console as in the following example:
[1073870] [fota/lwm2m] [INF] firmware_block_received_cb: 98%
[1078930] [fota/lwm2m] [INF] firmware_block_received_cb: 99%
[1085540] [fota/lwm2m] [INF] firmware_block_received_cb: 100%
Execute the Update
After the device has downloaded the update file, initiate the update by clicking on the “Exec” button on the Update line.
The device console logs messages as it resets into the bootloader, MCUBoot, which will load the new image:
[1171230] [fota/lwm2m] [DBG] firmware_update_cb: Executing firmware update
[1171230] [fota/lwm2m] [INF] firmware_update_cb: Update Counter: current -1, update -1
[1172260] [fota/lwm2m] [INF] reboot: Rebooting device
[MCUBOOT] [INF] main: Starting bootloader
[MCUBOOT] [INF] boot_status_source: Image 0: magic=good, copy_done=0xff, image_ok=0x1
[MCUBOOT] [INF] boot_status_source: Scratch: magic=unset, copy_done=0x2f, image_ok=0xff
[MCUBOOT] [INF] boot_status_source: Boot source: slot 0
[MCUBOOT] [INF] boot_swap_type: Swap type: test
[MCUBOOT] [INF] main: Bootloader chainload address offset: 0x8000
[MCUBOOT] [INF] main: Jumping to the first image slot
***** BOOTING ZEPHYR OS v1.9.99 - BUILD: Nov  8 2017 22:04:52 *****
[0000000] [fota/main] [INF] main: Linaro FOTA LWM2M example application
[0000010] [fota/main] [INF] main: Device: nrf52_blenano2, Serial: 1ef8e685
When the update execution is complete, the device will register with Leshan again.
Congratulations! You’ve just read and written objects, and done your first FOTA update using this system. Continue to the next page to secure LWM2M communications using DTLS.
Reporting Issues
Please report any issues to the Open Source Foundries FreshDesk.