hawkBit and MQTT Demonstration System
Warning
Technology demonstration system only.
While the system described below works as documented, it has important limitations that imply it should not be used as-is in production. It may also change incompatibly in the future.
Overview
This page documents how to set up and use a demonstration system containing IoT devices and an IoT gateway, which can publish sensor data from devices to the cloud and perform firmware over the air (FOTA) updates of the device firmware.
A block diagram of this system is shown here. One or more IoT devices can connect to the network through the same gateway.

System block diagram
The system contains Zephyr-based IoT devices, an IoT gateway, a device management and OTA system running in a container, and integration with a cloud-based MQTT service.
Using this demonstration system, you can:
- See live temperature readings from your devices appear in the web console provided by a cloud MQTT broker, CloudMQTT.
- Upload a cryptographically signed firmware image to a device management server, hawkBit.
- Use hawkBit to install a firmware image onto an IoT device via over the air update. The device will boot the update after checking its cryptographic signature.
Limitations
The system as implemented has some important limitations, including:
- It does not secure its network communications. The current implementation has the IoT device connecting directly to the hawkBit and MQTT servers. Securing these communications from end to end generally requires use of certificate-based TLS, which imposes infeasible resource requirements on current IoT board targets.
- The hawkBit server container is demonstration-grade only, and has security issues such as the use of default administrative passwords.
- The IoT device-side hawkBit implementation does not implement the complete hawkBit state machine. Features such as cancelling requested actions are not supported.
These implementation details imply that the current system should not be deployed as-is in production.
Prepare Environment
This system has the same dependencies as the one used in the microPlatforms tutorial. We also assume you have installed the microPlatforms as described in the tutorial.
Prepare the System
Set up CloudMQTT
Create a CloudMQTT account if you don’t have one already, and sign in. After you’ve signed in, create a new CloudMQTT instance to use with this system. The free instance plan is enough to run this demo, as shown below:
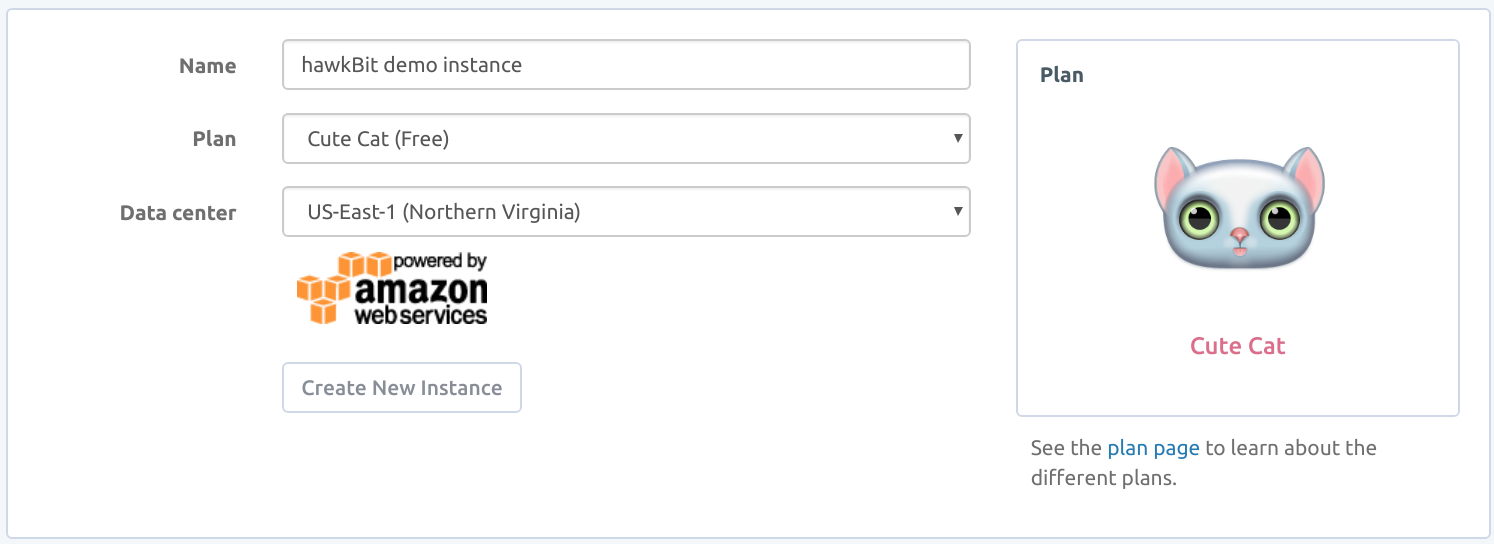
Create an instance for use with this sytem.
Then click on the “Details” button next to the new instance in your control panel. Record the following information about the instance:
- CLOUDMQTT_SERVER: the URL of the server
- CLOUDMQTT_USER: the auto-generated username
- CLOUDMQTT_PASSWORD: the auto-generated password
- CLOUDMQTT_PORT: the port to connect to on the server
The information is in your instance’s details page as shown:
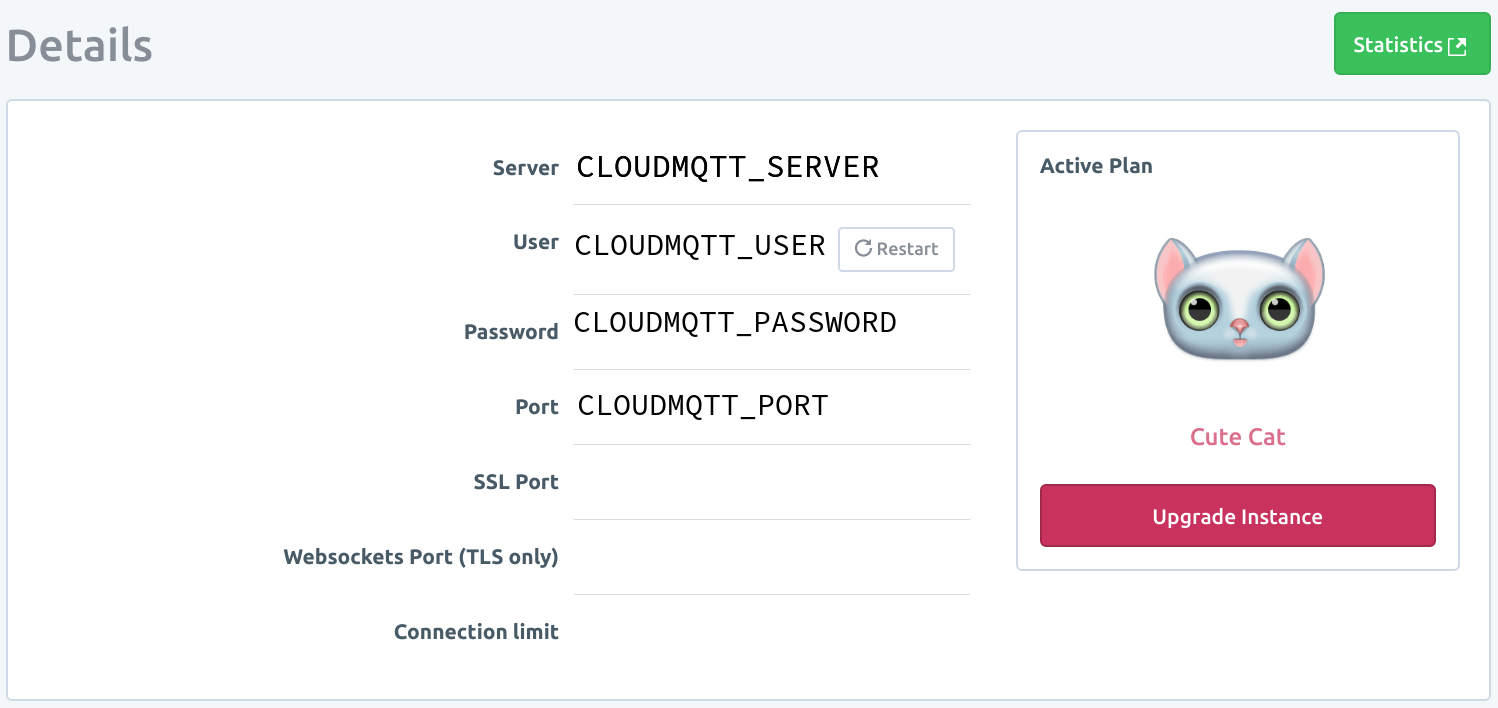
Instance information to collect.
Set Up the IoT Gateway
You’ll now use Ansible to set up your IoT gateway to act as a network proxy for your IoT device to publish sensor data to CloudMQTT, and fetch updates from hawkBit.
Ensure you have an SSH key on your workstation. If you’ve never done this before, the GitHub guide to SSH keys has useful instructions.
Copy your SSH key to the gateway in order to control it with Ansible:
ssh-copy-id osf@raspberrypi3-64.local
Use the password for the
osfaccount you set earlier when installing the Linux microPlatform (the default isosf, but we recommend that you change it).Clone
gateway-ansible, a repository of Ansible playbooks, helper scripts and files, and Dockerfiles, onto your workstation.Subscribers:
For passwordless authentication, create a file named
.netrc(note the leading.) in your home directory, readable only by your user, with the following contents:machine source.foundries.io login <your-subscriber-token>
If you don’t createa
.netrc, enter your subscriber token when prompted for a username, and leave the password blank.Now clone the gateway-ansible repository:
git clone https://source.foundries.io/gateway-ansible
Public:
git clone https://github.com/OpenSourceFoundries/gateway-ansible
From the
gateway-ansiblerepository, deploy the gateway containers using the CloudMQTT information you recorded earlier.Subscribers:
CLOUDMQTT_HOST=XXX CLOUDMQTT_PORT=XXX CLOUDMQTT_USER=XXX CLOUDMQTT_PASSWD=XXX \
    GW_HOSTNAME=raspberrypi3-64.local REGISTRY_PASSWD=<subscriber-token> ./iot-gateway.sh
Setting REGISTRY_PASSWD to your subscriber token is necessary so your gateway device can log in to the container registry.
Public:
CLOUDMQTT_HOST=XXX CLOUDMQTT_PORT=XXX CLOUDMQTT_USER=XXX CLOUDMQTT_PASSWD=XXX \
    REGISTRY=hub.docker.com REGISTRY_USER=docker REGISTRY_PASSWD=docker \
    GW_HOSTNAME=raspberrypi3-64.local ./iot-gateway.sh
These instructions assume use of Raspberry Pi 3 on a local network supporting Zeroconf. Adjust
GW_HOSTNAMEas needed if your environment is different.They also assume
iot-gateway.shis run on the same machine running the hawkBit server. SetMGMT_SERVERto the IP address of the machine running the hawkBit container if your environment is different.
Your gateway device is now ready for use.
Set up hawkBit
Now run a demonstration-grade hawkBit server on your workstation (not the gateway).
Warning
This hawkBit container contains an official
hawkbit-update-server artifact build from Maven; however, it is
for demonstration purposes only, and should not be deployed in
production as-is.
Among other potential issues, the server has an insecure default administrative username/password pair. For more information, see the official documentation on building and running hawkBit and hawkBit security.
Subscribers:
First, log in to the Open Source Foundries subscriber container registry on your worksation (not the gateway device):
docker login hub.foundries.io --username=unused
The username is currently ignored when logging in, but a value must be provided. When prompted for the password, enter your subscriber token.
Now run hawkBit on your workstation:
docker run -dit --name hawkbit -p 8080:8080 hub.foundries.io/hawkbit-update-server:latest
If this command fails, ensure docker login succeeds and retry.
Public: to run the latest public release on Docker Hub:
docker run -dit --name hawkbit -p 8080:8080 opensourcefoundries/hawkbit-update-server:latest
This container can take approximately 40 seconds for the application to start for the first time.
After running the hawkBit container, visit http://localhost:8080/UI to
load the administrative interface, and log in with the default
username and password (admin/admin). Your browser window
should look like this:

Your hawkBit container is now ready for use.
Note
For convenience, you may want to adjust the “Polling Time” in the “System Config” area. This will instruct your IoT devices to check for updates more frequently. The default is 5 minutes; the minimum value is 30 seconds.
Set Up the IoT Device(s)
Using BLE Nano 2, build and flash the demonstration application for this system:
./zmp build -b nrf52_blenano2 zephyr-fota-samples/dm-hawkbit-mqtt
./zmp flash -b nrf52_blenano2 zephyr-fota-samples/dm-hawkbit-mqtt
Flashing this board requires pyOCD. To install this dependency, run:
pip install --user pyOCD
If you don’t have pip installed, see the pip Installation documentation. On Linux platforms, you also need to install the following udev rules as root, then unplug and plug back in any boards you may have connected:
echo 'ATTR{idProduct}=="0204", ATTR{idVendor}=="0d28", MODE="0666", GROUP="plugdev"' > /etc/udev/rules.d/50-cmsis-dap.rules
If you don’t have a BLE Nano 2, information for other boards is provided on a best-effort basis below in Appendix: Additional IOT devices.
Use the System
Now that your system is fully set up, it’s time to check that sensor data are being sent to the cloud, and do a FOTA update.
Cloud Sensor Updates
Choose the instance you created for this demo from your CloudMQTT instances list, then click the “Websocket UI” button to get a live view of data being sent to the server. You should see new data appear every few seconds; it will look like this:
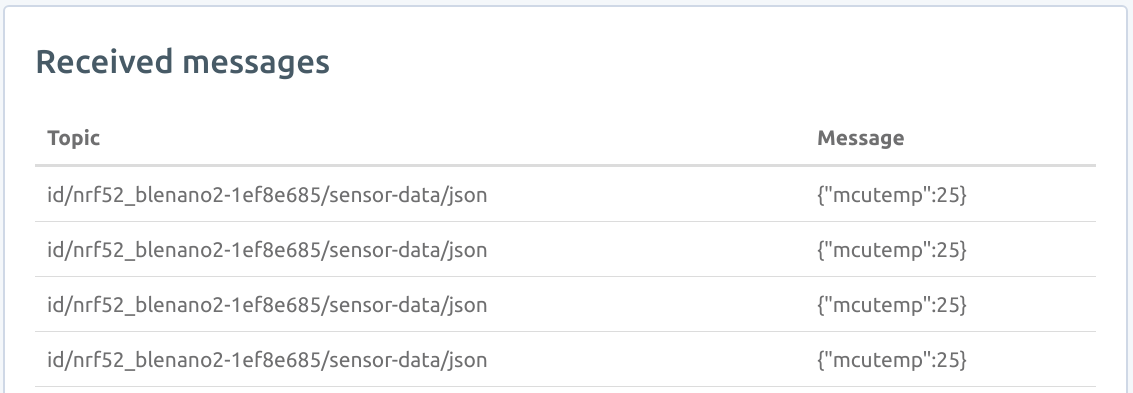
MQTT messages from BLE Nano 2 appearing in CloudMQTT Websocket UI.
You can now connect other subscribers to this CloudMQTT instance, which can act on the data.
FOTA Updates
Now let’s perform a FOTA update. In the hawkBit server UI, you should see the 96Boards device show up in the “Targets” pane. It will look like this:
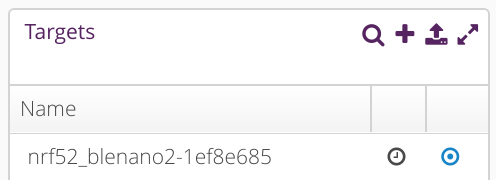
BLE Nano 2 registered with hawkBit.
It’s time to upload a firmware binary to the server, and update it using this UI. We’ve provided a Python script to make this easier, which works with either Python 2 or 3.
Run it from the Zephyr microPlatform installation directory:
python zephyr-fota-samples/dm-hawkbit-mqtt/scripts/hawkbit.py \
                  -d 'BLE Nano 2 Update' \
                  -f outdir/zephyr-fota-samples/dm-hawkbit-mqtt/nrf52_blenano2/app/zephyr/dm-hawkbit-mqtt-nrf52_blenano2-signed.bin \
                  -sv "1.0" -p "OSF" -n "nrf52_blenano2 update" -t os
Above, 1.0 is an arbitrary version number. If hawkBit is running on a
different machine, use the -ds and -sm options. For more help
on using this script, run:
python zephyr-fota-samples/dm-hawkbit-mqtt/scripts/hawkbit.py -h
You will see an update in the hawkBit UI for the new image:
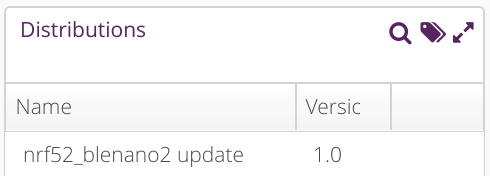
Distribution Set representing a signed firmware binary.
You’ll now update the device. Before doing so, you can connect to its
serial console via USB at 115200 baud to see log messages during the
upgrade (which should be at /dev/ttyACM0 or so on Linux systems).
Click on the distribution you uploaded, and drag it over the line in “Targets” for your IoT Device.
You’ll next need to confirm the action. Click a button towards the bottom of your screen labeled “You Have Actions”. This should now have a “1” at its top right, since you’ve assigned the distribution to your IoT device:

Click this button.
A screen will appear. Select “Save Assign” on this screen:
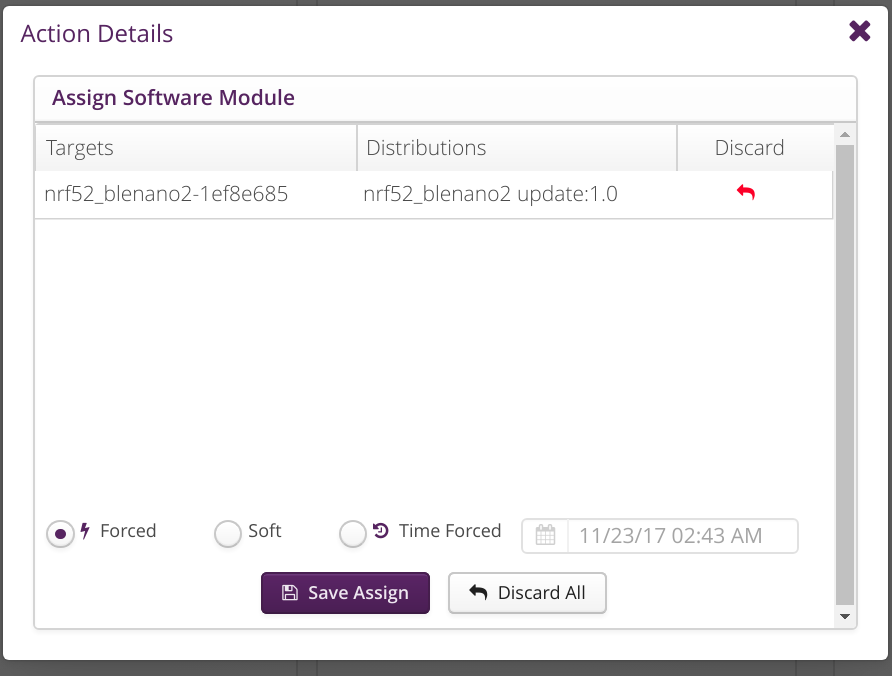
Choose “Save Assign”.
Your IoT devices will poll the hawkBit server periodically and will fetch the update the next time they poll.
Note
By default, devices wait five minutes between polls. If you don’t
want to wait, just power cycle the IoT device; the
dm-hawkbit-mqttt application checks for updates shortly after
booting.
While hawkBit is waiting for the device to download and install the update, a yellow circle will appear next to it in the targets list:

Waiting for BLE Nano 2 to update.
If you’re connected to the device’s serial console, look for output like this while the update is being downloaded:
[0730950] [fota/hawkbit] [INF] hawkbit_ddi_poll: Valid action ID 1 found, proceeding with the update
[0730960] [fota/hawkbit] [INF] hawkbit_report_dep_fbk: Reporting deployment feedback success (proceeding) for action 1
[0730970] [fota/hawkbit] [DBG] hawkbit_report_dep_fbk: JSON response: {"id":"1","status":{"execution":"proceeding","result":{"finished":"success"}}}
[0730980] [fota/hawkbit] [DBG] hawkbit_query: [POST] HOST:gitci.com:8080 URL:/DEFAULT/controller/v1/nrf52_blenano2-1ef8e685/deploymentBase/1/feedback
[0731300] [fota/hawkbit] [DBG] hawkbit_query: Hawkbit query completed
[0731410] [fota/hawkbit] [INF] hawkbit_install_update: Starting the download and flash process
[0732660] [fota/hawkbit] [DBG] install_update_cb: 1%
[0733360] [fota/hawkbit] [DBG] install_update_cb: 2%
[0734260] [fota/hawkbit] [DBG] install_update_cb: 3%

[... etc.]
Finally, when the update is installed, the device will reset and MCUBoot will load the new image, which will initialize itself:
[MCUBOOT] [INF] main: Starting bootloader
[MCUBOOT] [INF] boot_status_source: Image 0: magic=good, copy_done=0xff, image_ok=0x1
[MCUBOOT] [INF] boot_status_source: Scratch: magic=unset, copy_done=0x2f, image_ok=0xff
[MCUBOOT] [INF] boot_status_source: Boot source: slot 0
[MCUBOOT] [INF] boot_swap_type: Swap type: test
[MCUBOOT] [INF] main: Bootloader chainload address offset: 0x8000
[MCUBOOT] [INF] main: Jumping to the first image slot
***** BOOTING ZEPHYR OS v1.9.99 - BUILD: Nov  8 2017 21:33:01 *****
Setting Bluetooth MAC
[0000000] [fota/main] [INF] main: Linaro FOTA example application
[0000010] [fota/main] [INF] main: Device: nrf52_blenano2, Serial: 1ef8e685
starting test - Running Built in Self Test (BIST)
Initializing Hawkbit backend
[0000020] [fota/hawkbit] [INF] hawkbit_start: ACID: current -1, update 1
[0000030] [fota/hawkbit] [INF] hawkbit_start: Current boot status ff
[0000040] [fota/hawkbit] [INF] hawkbit_start: Updated boot status to 1
[0000150] [fota/hawkbit] [DBG] hawkbit_start: Erased flash bank at offset 3c000
[0000260] [fota/hawkbit] [INF] hawkbit_start: ACID updated, current 1, update 1
[0000260] [fota/hawkbit] [INF] hawkbit_service: Starting FOTA Service Thread
PASS - hawkbit_init.
During its next poll, the IoT device will inform hawkBit that it has successfully booted:
[0031260] [fota/hawkbit] [DBG] hawkbit_ddi_poll: artifact address: /DEFAULT/controller/v1/nrf52_blenano2-1ef8e685/softwaremodules/1/artifacts/dm-hawkbit-mqtt-nrf52_blenano2-signed.bin
[0031270] [fota/hawkbit] [DBG] hawkbit_ddi_poll: artifact file size: 212992
[0031280] [fota/hawkbit] [INF] hawkbit_report_dep_fbk: Reporting deployment feedback success (closed) for action 1
[0031290] [fota/hawkbit] [DBG] hawkbit_report_dep_fbk: JSON response: {"id":"1","status":{"execution":"closed","result":{"finished":"success"}}}
[0031300] [fota/hawkbit] [DBG] hawkbit_query: [POST] HOST:gitci.com:8080 URL:/DEFAULT/controller/v1/nrf52_blenano2-1ef8e685/deploymentBase/1/feedback
[0031620] [fota/hawkbit] [DBG] hawkbit_query: Hawkbit query completed
At this point, the yellow circle will turn into a green check box:

BLE Nano 2 successfully updated.
Congratulations! You’ve just done your first FOTA update using this system.
Reporting Issues
Please report any issues to the Open Source Foundries FreshDesk.
Appendix: Additional IOT devices
FRDM-K64F
Building for FRDM-K64F requires some configuration information which depends on your local network:
- An IP address to use for the IoT gateway
- Whether the board should use DHCP, or a static IP address
This information must be written to the file zephyr-fota-samples/dm-hawkbit-mqtt/boards/frdm_k64f-local.conf
in the Zephyr microPlatform installation directory.
To use DHCP, with gateway IP address A.B.C.D, create the file with the following contents.
CONFIG_NET_DHCPV4=y
CONFIG_NET_APP_PEER_IPV4_ADDR="A.B.C.D"
To use a static IP address X.Y.Z.W for the FRDM-K64F instead, use this.
CONFIG_NET_APP_MY_IPV4_ADDR="X.Y.Z.W"
CONFIG_NET_APP_PEER_IPV4_ADDR="A.B.C.D"
Now you can build the binaries. From the Zephyr microPlatform installation directory:
./zmp build -b frdm_k64f zephyr-fota-samples/dm-hawkbit-mqtt
Flashing this board requires pyOCD. To install this dependency, run:
pip install --user pyOCD
If you don’t have pip installed, see the pip Installation documentation. On Linux platforms, you also need to install the following udev rules as root, then unplug and plug back in any boards you may have connected:
echo 'ATTR{idProduct}=="0204", ATTR{idVendor}=="0d28", MODE="0666", GROUP="plugdev"' > /etc/udev/rules.d/50-cmsis-dap.rules
To flash the binaries, plug the K64F into your system via the USB connector labeled “SDA USB”. Then, from the Zephyr microPlatform installation directory:
./zmp flash -b frdm_k64f zephyr-fota-samples/dm-hawkbit-mqtt
96Boards Nitrogen
Like FRDM-K64F, this board also requires pyOCD to flash.
To build the binaries, run this from the Zephyr microPlatform installation directory:
./zmp build -b 96b_nitrogen zephyr-fota-samples/dm-hawkbit-mqtt
To flash the board:
./zmp flash -b 96b_nitrogen zephyr-fota-samples/dm-hawkbit-mqtt
Appendix: hawkBit References
This section contains additional reference material regarding hawkBit.
- Upstream Github: https://github.com/eclipse/hawkbit
- Data model: https://github.com/eclipse/hawkbit/wiki/Data-model
- Open Source Foundries Docker container: https://github.com/OpenSourceFoundries/core-containers
- Open Source Foundries Docker Hub: https://hub.docker.com/r/opensourcefoundries/hawkbit-update-server/